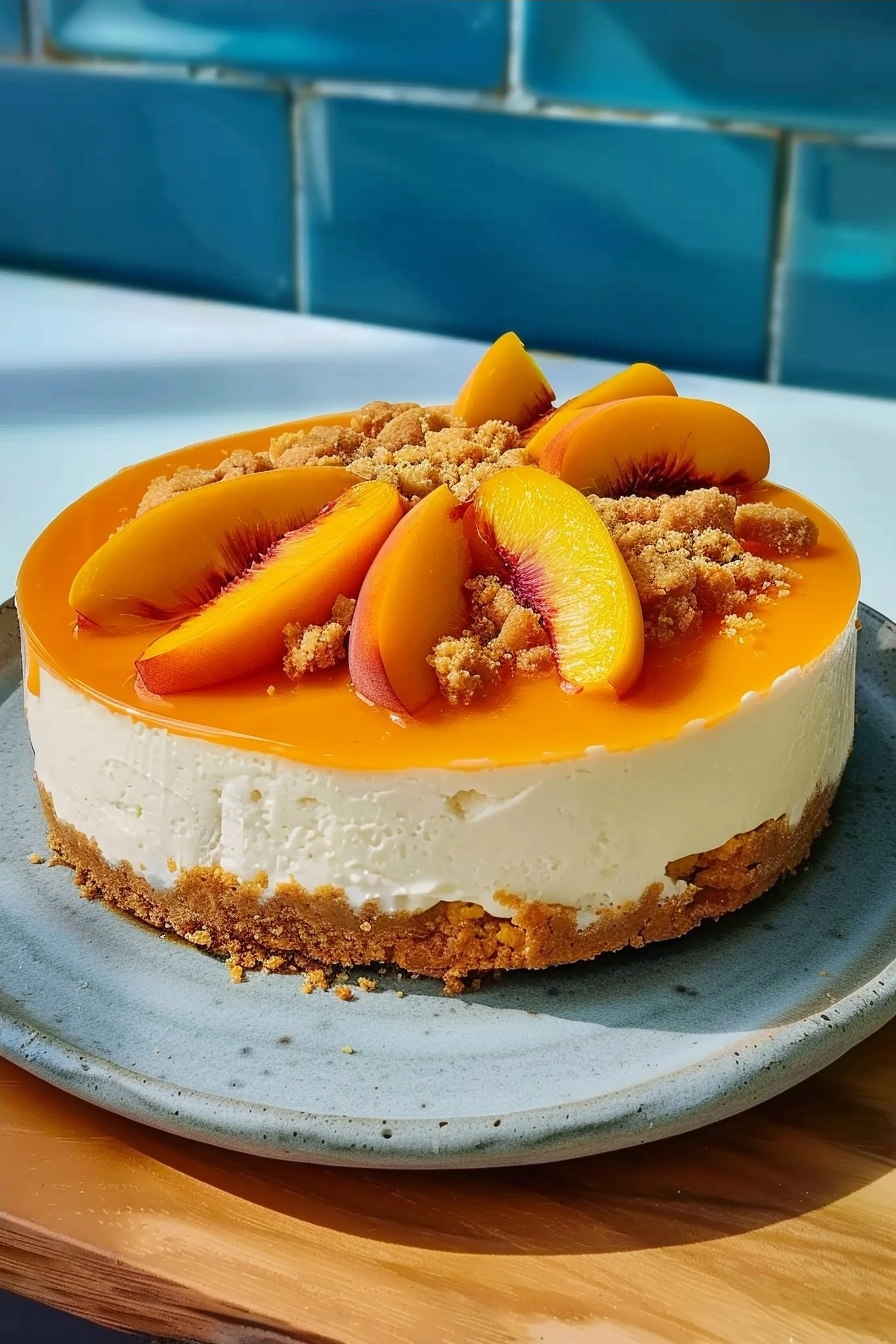
No-Bake Peaches and Cream Cheesecake delivers a silky smooth texture combined with the vibrant sweetness of fresh summer fruit. This dessert relies on a rich blend of cream cheese and ricotta to create a decadent profile without requiring any oven time. It serves as an ideal centerpiece for warm weather gatherings where cool, creamy textures shine. You will appreciate the perfect balance between the tangy cheese base and the natural peach syrup drizzle.
| Category | Details |
|---|---|
| Prep Time | 30 minutes |
| Cook Time | 0 minutes |
| Total Time | 6 hours (including chilling) |
| Servings | 12 servings |
| Difficulty | Easy |
| Cuisine | Modern American |
Why This Recipe Works
This recipe works because it leverages the natural thickening power of chilled dairy to achieve stability without gelatin. I spent several afternoons testing ratios, discovering that the inclusion of ricotta lightens the density of standard cream cheese, providing a fluffier mouthfeel that pairs beautifully with fresh fruit.
You will love the convenience of a dessert that demands no heat, keeping your kitchen cool even on the hottest July days. The method ensures a consistent set every time as long as you respect the chilling phase, making this a reliable project for both beginner and seasoned bakers alike.
Ingredients
| Ingredient | Quantity | Notes |
| Graham Crackers | 9.5 oz | Finely crushed |
| Unsalted Butter | 0.5 cup | Melted completely |
| Kosher Salt | 1.5 tsp | Split into two portions |
| Fresh Peaches | 2 cups | Peeled and sliced |
| Agave Nectar | 10 tbsp | Divided use |
| Cream Cheese | 3 packages | Must be room temperature |
| Ricotta Cheese | 16 oz | Whole-milk variety |
| Powdered Sugar | 1.66 cups | Sifted to prevent lumps |
| Lemon Juice | 0.25 cup | Freshly squeezed |
| Garnish Peaches | 1-2 pieces | Unpeeled for texture |
Step-by-Step Instructions
Preparing the Crust
- Combine the crushed graham crackers, melted butter, and 0.5 teaspoon of kosher salt in a mixing bowl.
- Press this mixture firmly into the bottom of a 9-inch springform pan to create a dense, even base.
- Chill the crust in the refrigerator for at least 30 minutes while you prepare the filling.
Creating the Peach Layer
- Macerate the 2 cups of peeled peaches with 4 tablespoons of agave nectar and 0.5 teaspoon salt in a bowl.
- Allow these to sit for 15 minutes to release their natural juices into the syrup.
Mixing the Cheesecake Filling
- Beat the cream cheese, ricotta, powdered sugar, remaining agave nectar, lemon juice, and remaining salt until perfectly smooth.
- Fold the macerated peaches gently into the cheese base without overworking the mixture.
- Pour the filling over the chilled crust and smooth the top with a spatula.
Final Setting
- Refrigerate the cheesecake for at least 5 hours to allow the structure to firm up properly.
- Top with fresh unpeeled peach slices immediately before serving.
Chef Tips for Perfect Results
- Ensure cream cheese is fully at room temperature to avoid lumps in your final batter.
- Use a high-quality whole-milk ricotta to maintain the intended creaminess and richness.
- Sift your powdered sugar through a fine-mesh sieve to achieve the smoothest possible texture.
- Press the crust firmly using the back of a glass to ensure it stays intact during slicing.
- Avoid over-mixing the filling once the peaches are added to prevent the fruit from breaking down too much.
Common Mistakes to Avoid
- Using cold cream cheese creates small, unappetizing lumps that ruin the velvety texture of the filling. Always plan ahead and set your ingredients out early.
- Skipping the chilling time results in a runny, unstable mess. The dairy needs those hours in the fridge to bond and structure correctly.
- Using low-fat dairy alternatives leads to a weak, watery consistency. Stick to full-fat options for the stability required for a no-bake dessert.
- Over-sweetening occurs if you ignore the balance provided by the lemon juice. The acidity is essential to cut through the sugar and enhance the fruit flavor.
Variations and Substitutions
| Ingredient | Substitution | Impact on Flavor |
| Agave Nectar | Honey | Adds floral notes |
| Graham Crackers | Ginger Snaps | Spicier, bolder profile |
| Lemon Juice | Lime Juice | Tarter, more tropical |
Serving Suggestions and Pairings
Serve this cheesecake alongside a glass of chilled sparkling apple cider or a light herbal iced tea for a refreshing contrast. It pairs well with a side of lightly whipped heavy cream or a sprinkle of toasted almonds for added crunch during summer garden parties or brunch events.
Storage and Reheating
| Method | Duration | Instructions |
| Refrigerator | 3-4 days | Keep in an airtight container |
| Freezer | Up to 1 month | Wrap tightly in plastic wrap |
Nutritional Information
Approximate values per serving:
| Nutrient | Amount |
| Calories | 380 kcal |
| Fat | 22g |
| Protein | 7g |
| Carbohydrates | 42g |
| Sugar | 31g |
Frequently Asked Questions
Can I substitute the ricotta with Greek yogurt?
You can substitute the ricotta with thick Greek yogurt if you desire a tangier profile. This will make the final result slightly softer, so ensure your yogurt is strained of excess whey.
How do I know when the cheesecake is fully set?
The cheesecake is fully set when the center remains firm to the touch and no longer jiggles upon gentle movement. If the center feels soft, allow it more time in the refrigerator.
Why is my filling not thickening properly?
Your filling likely lacks structure due to temperature issues or the use of lower-fat dairy products. Ensure all ingredients reach room temperature before mixing and stick to the recommended whole-milk options.
Can I assemble this dessert a day in advance?
You should absolutely prepare this dessert one day ahead of time for the best results. The flavors meld perfectly after 24 hours of resting in the cold environment.
What is the best way to slice the cake without ruining the edges?
The best way to slice is by using a hot, clean knife dipped in warm water and wiped dry before each cut. This technique glides through the creamy layers without dragging.
No-Bake Peaches and Cream Cheesecake offers a sophisticated end to any meal without the stress of oven management. By following the steps and tips provided, you guarantee a professional finish every time. Embrace the ease of this recipe, and savor the combination of fresh peaches and decadent cream in every single bite.
PrintNo-Bake Peaches and Cream Cheesecake
This luxurious no-bake dessert combines creamy room-temperature cream cheese and ricotta for a light, airy filling set upon a buttery graham cracker crust. Perfectly balanced with fresh peaches and a sweet agave nectar drizzle, this cool, refreshing treat is the ideal centerpiece for summer gatherings, requiring no oven time and minimal effort to produce an elegant finish.
- Prep Time: 30
- Total Time: 360
- Yield: 12 servings
- Category: All Recipes
- Method: No-Bake
- Cuisine: Modern American
- Diet: Vegetarian
Ingredients
9.5 oz graham crackers, finely crushed
0.5 cup unsalted butter, melted
1.5 tsp kosher salt, divided
2 cups fresh peaches, peeled and sliced
10 tbsp agave nectar, divided
3 packages (8oz each) cream cheese, softened
16 oz whole-milk ricotta cheese
1.66 cups powdered sugar, sifted
0.25 cup lemon juice, freshly squeezed
1-2 fresh peaches, unpeeled for garnish
Instructions
Combine crushed graham crackers, melted butter, and 0.5 teaspoon salt in a bowl.
Press mixture firmly into the bottom of a 9-inch springform pan and refrigerate for 30 minutes.
Macerate 2 cups of peeled peaches with 4 tablespoons agave nectar and 0.5 teaspoon salt for 15 minutes.
In a large bowl, beat room temperature cream cheese, ricotta, powdered sugar, lemon juice, and remaining 6 tablespoons agave nectar until silky and smooth.
Fold in the macerated peach mixture into the cheese filling.
Pour the filling over the prepared crust, smoothing the top with a spatula.
Refrigerate for at least 6 hours until fully set.
Garnish with additional sliced fresh peaches before serving.
Notes
Ensure all dairy ingredients are at room temperature before mixing to prevent lumps. The chilling phase is critical for the set; do not rush it. Store in the refrigerator for up to 3 days.