No-Bake Chocolate Peanut Butter Bites offer a convenient, nutrient-dense snack that combines protein-rich nut butter with decadent cocoa and wholesome rolled oats. These bite-sized treats require no oven usage, making them the perfect solution for quick energy boosts during busy afternoons or post-workout recovery sessions. This recipe delivers a satisfying texture and rich flavor profile that appeals to both children and adults seeking a quick, healthy snack.
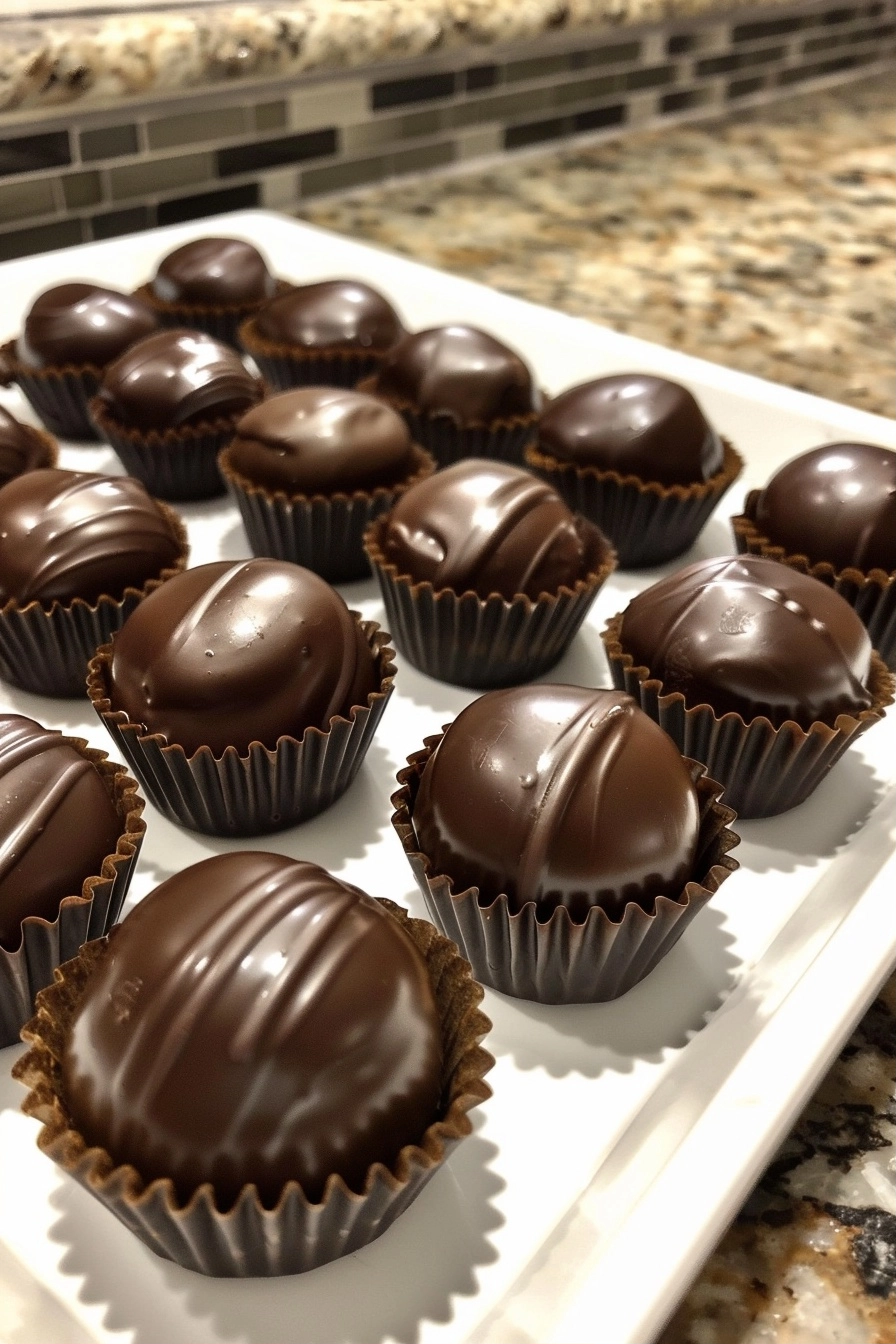
Recipe Overview
| Prep Time | 15 minutes |
| Cook Time | 0 minutes |
| Total Time | 45 minutes |
| Servings | 12 bites |
| Difficulty | Easy |
| Cuisine | American |
Why This Recipe Works
This recipe works because the natural fats in the peanut butter bind the dry ingredients perfectly without the need for high-heat cooking. I discovered this method while experimenting with quick snacks that satisfy my sweet tooth without compromising nutritional goals. The combination of honey and cocoa creates a deep, fudge-like quality that mimics more calorie-dense desserts while remaining balanced.
You will appreciate the flexibility these bites offer when you need a grab-and-go snack for school or office lunches. Because the oats absorb the moisture from the honey and peanut butter, each bite remains firm yet chewy even after refrigeration. This structural integrity makes them ideal for meal prepping in larger batches for the week ahead.
Ingredients
| Ingredient | Quantity | Notes |
|---|---|---|
| Rolled Oats | 1 cup | Use old-fashioned oats for the best chewy texture. |
| Peanut Butter | 1/2 cup | Use creamy, unsweetened varieties for optimal binding. |
| Honey | 1/3 cup | Maple syrup works as a vegan-friendly substitute. |
| Cocoa Powder | 1/3 cup | Ensure it is unsweetened high-quality cocoa powder. |
| Chocolate Chips | 1/2 cup | Dark chocolate chips provide a sharper flavor contrast. |
| Vanilla Extract | 1 tsp | Pure vanilla extract provides the best aromatic depth. |
Step-by-Step Instructions
Combining Ingredients
- Whisk the peanut butter, honey, and vanilla extract in a medium mixing bowl until the consistency becomes smooth and uniform.
- Fold the rolled oats into the wet mixture using a sturdy silicone spatula to ensure even distribution.
- Sift the cocoa powder into the bowl to prevent clumps and stir until the oats are thoroughly coated.
- Incorporate the chocolate chips by gently folding them into the dough until they are distributed throughout the mixture.
Chilling and Shaping
- Cover the bowl tightly and place the mixture in the refrigerator for 30 minutes to firm up the fats.
- Scoop approximately one tablespoon of the mixture and roll it between your palms to form a tight, round sphere.
- Repeat the rolling process until the entire mixture is formed into individual bites.
- Transfer the finished bites to an airtight container for final storage or immediate service.
Chef Tips for Perfect Results
- Toast your rolled oats in a dry skillet for three minutes to deepen the nutty profile of the bites.
- Dampen your palms slightly with water before rolling the mixture to prevent the dough from sticking to your skin.
- Use a small cookie scoop to maintain uniform size for consistent nutritional values across every individual serving.
- Add a pinch of flaky sea salt on top of each bite to enhance the contrast between the chocolate and peanut butter.
Common Mistakes to Avoid
- Using natural peanut butter with excess oil separation can result in greasy bites that fail to hold their shape. Drain excess oil before measuring.
- Overmixing the dough can break down the structure of the oats and lead to a mushy rather than chewy texture.
- Using quick-cooking oats instead of rolled oats often results in a floury, soft mouthfeel that lacks the desired bite.
- Skipping the chilling step makes the dough too sticky to roll effectively, resulting in messy hands and uneven, misshapen treats.
Variations and Substitutions
| Ingredient | Substitution | Impact on Flavor |
|---|---|---|
| Peanut Butter | Almond Butter | Adds a subtle earthiness and higher vitamin E content. |
| Honey | Agave Nectar | Produces a thinner texture and a more neutral sweetness profile. |
| Chocolate Chips | Dried Cranberries | Introduces a tart, chewy element and reduces overall sugar content. |
Serving Suggestions and Pairings
Serve these bites alongside a glass of almond milk or black coffee for a balanced afternoon snack. They function well as a pre-workout fuel source when eaten 30 minutes before exercise. For formal occasions, present them in mini muffin liners to create a professional look for party platters or dessert displays.
Storage and Reheating
| Method | Duration | Instructions |
|---|---|---|
| Refrigerator | 7 days | Store in an airtight container to prevent odor absorption. |
| Freezer | 3 months | Place in a freezer-safe bag with parchment paper between layers. |
Nutritional Information (Approximate values)
| Nutrient | Amount per Serving |
|---|---|
| Calories | 145 |
| Protein | 4g |
| Fat | 8g |
| Carbohydrates | 16g |
| Fiber | 2g |
| Sugar | 9g |
Frequently Asked Questions
Can I use natural peanut butter for these bites?
Natural peanut butter works well if you ensure the oil is fully emulsified before measuring. If your natural butter is separated, store the jar upside down or stir it vigorously until the texture is completely smooth.
How do I know when they are properly chilled?
The dough is ready for shaping when it feels tacky but no longer leaves a significant amount of residue on your fingers. Chilling for at least 30 minutes allows the peanut butter fats to set enough for easy handling.
What should I do if the dough is too dry?
Dry dough typically results from excessive oats or low-moisture honey. Add an extra teaspoon of peanut butter or honey until the mixture sticks together firmly when squeezed.
Can these be made ahead of time?
These bites store perfectly for up to one week in the refrigerator. Making them a day in advance often improves the flavor as the cocoa and vanilla meld with the oats.
Are these bites suitable for lunch boxes?
These bites remain stable at room temperature for several hours. Pack them in a cool bag if your commute involves extended exposure to heat.
Conclusion
Mastering these No-Bake Chocolate Peanut Butter Bites provides a reliable, healthy snack option for any busy schedule. By focusing on quality ingredients and following the proper chilling techniques, you ensure a delicious result every time. These bites offer the perfect balance of indulgence and nourishment, proving that simple ingredients create the best flavors. Start your batch today and enjoy the convenient, wholesome sweetness of this classic combination.
PrintNo-Bake Chocolate Peanut Butter Bites

These nutrient-dense No-Bake Chocolate Peanut Butter Bites are the perfect grab-and-go snack for busy schedules. Combining creamy peanut butter, wholesome rolled oats, and rich cocoa, these treats offer a satisfying, fudge-like texture without any oven time. Naturally sweetened with honey, they provide a quick energy boost and are ideal for school lunches or post-workout recovery. Easy to prepare and even better the next day, these bite-sized snacks are a must-have for your meal-prep rotation.
- Prep Time: 15
- Total Time: 45
- Yield: 12 bites
- Category: Deserts
- Method: No-Bake
- Cuisine: American
- Diet: Vegetarian
Ingredients
1 cup rolled oats
1/2 cup creamy peanut butter
1/3 cup honey
1/3 cup unsweetened cocoa powder
1/2 cup dark chocolate chips
1 tsp pure vanilla extract
Instructions
In a medium mixing bowl, whisk together the peanut butter, honey, and vanilla extract until smooth.
Fold the rolled oats into the wet mixture using a spatula.
Sift the cocoa powder into the bowl and stir until all oats are well coated.
Gently fold in the chocolate chips.
Chill the dough in the refrigerator for 30 minutes to firm up.
Once chilled, scoop into bite-sized portions and roll into balls with your hands.
Store in an airtight container in the refrigerator for up to one week.
Notes
Use maple syrup as a vegan-friendly substitute for honey. For the best texture, use old-fashioned rolled oats. These bites keep well in the refrigerator for up to 7 days, making them perfect for weekly meal prep.