1. Introduction
There’s something irresistibly refreshing about lemon desserts. That perfect balance between sweet and tangy, soft and buttery, light yet indulgent—it’s what makes lemon bars a timeless favorite across generations.
Lemon bars are believed to have roots in American home baking traditions, especially popularized in the mid-20th century when citrus desserts became a staple in family kitchens. They quickly earned their place as a go-to treat for bake sales, picnics, and afternoon tea.
What makes these lemon bars truly special is their simplicity paired with bold flavor. A crisp, buttery shortbread crust forms the base, topped with a silky, zesty lemon filling that melts in your mouth. And the best part? You can make them in just 30 minutes, making them perfect for busy days when you still want something homemade and impressive.
2. Recipe Overview
- Cuisine Type: American
- Difficulty Level: Easy ⭐
- Total Time: 30 minutes
- Servings: 9–12 bars
Dietary Info:
- Vegetarian
- Can be made gluten-free
3. Equipment and Tools
Essential Tools:
- Mixing bowls (medium + large)
- Whisk
- Spatula
- Baking pan (20×20 cm / 8×8 inch)
- Oven
Measurements:
- Measuring cups (240 ml)
- Measuring spoons
Optional:
- Parchment paper (for easy removal)
- Fine sieve (for powdered sugar dusting)
4. Serving Suggestions
How to Serve:
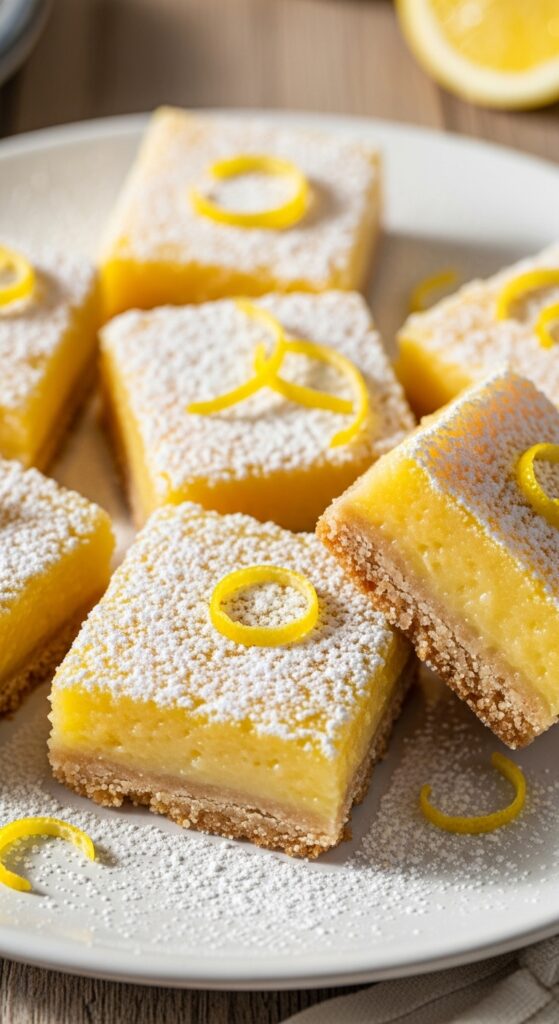
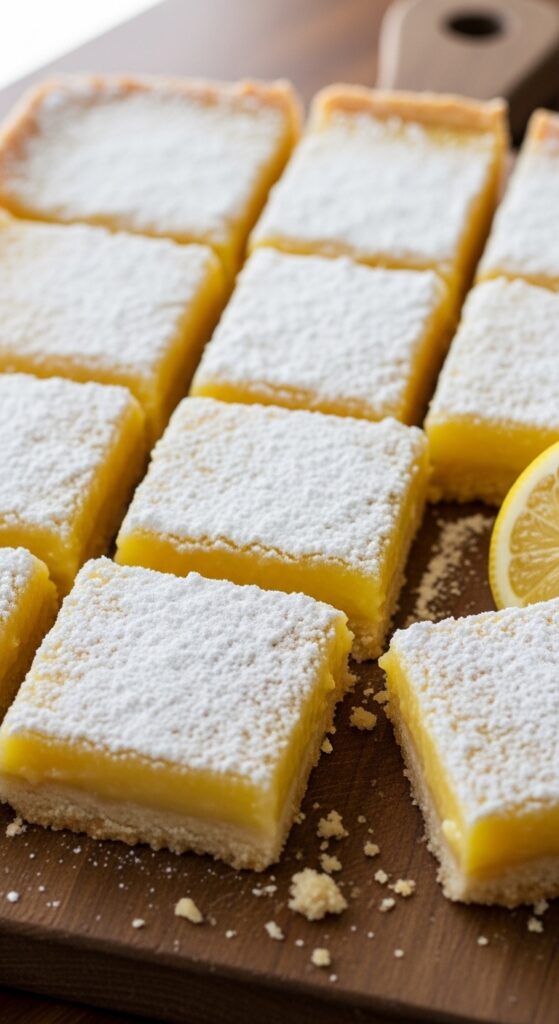
- Cut into neat squares
- Dust with powdered sugar for a classic look
Garnish Ideas:
- Lemon zest 🍋
- Mint leaves 🌿
- Thin lemon slices
Pair It With:
- Tea ☕
- Iced lemonade 🍹
- Coffee
5. Nutritional Information (Per Serving)
- Calories: ~210 kcal
- Carbs: 26g
- Protein: 3g
- Fat: 10g
- Sugar: 16g
Benefits:
- Rich in Vitamin C
- Light dessert option compared to cakes
6. Storage and Reheating
Storage:
- Store in fridge up to 4 days
- Keep in airtight container
Freezing:
- ✅ Yes (up to 2 months)
Reheating:
- No reheating needed
- Serve chilled or room temp
7. Expert Tips and Variations
Pro Tips:
- Use fresh lemon juice for best flavor
- Don’t overbake → filling should be slightly soft
- Let bars cool completely before cutting
Common Mistakes:
- ❌ Overcooking → dry texture
- ❌ Too much flour → dense filling
Variations:
- Add coconut flakes 🥥
- Make it extra tangy with more zest
- Use orange or lime for a twist
8. Ingredients
For the Crust:
- 120g (1/2 cup) butter (softened)
- 50g (1/4 cup) sugar
- 150g (1 cup) flour
For the Lemon Filling:
- 2 large eggs
- 150g (3/4 cup) sugar
- 60 ml (1/4 cup) fresh lemon juice
- 1 tbsp lemon zest
- 2 tbsp flour
Optional:
- Powdered sugar (for topping)
9. Step-by-Step Instructions
Step 1: Prepare the Crust
- Mix butter + sugar until creamy
- Add flour and mix until dough forms
- Press into baking pan
👉 Bake at 180°C (350°F) for 10 minutes
Step 2: Make the Filling
- Whisk eggs + sugar
- Add lemon juice + zest
- Mix in flour
Step 3: Bake Again
- Pour filling over crust
- Bake for 15–20 minutes
👉 Center should be slightly set, not liquid
Step 4: Cool & Serve
- Let cool completely
- Dust with powdered sugar
- Cut into squares
10. Frequently Asked Questions (FAQ)
1. Can I make them ahead?
Yes! They taste even better the next day.
2. Why is my filling runny?
It needs more baking time or cooling time.
3. Can I use bottled lemon juice?
Fresh is highly recommended for flavor.
4. How do I cut clean squares?
Use a sharp knife and wipe between cuts.
5. Can I reduce sugar?
Yes, but it will affect the balance of flavor.
11. Conclusion
These 30-minute lemon bars are proof that simple ingredients can create something truly unforgettable. With their buttery crust and bright, tangy filling, they strike the perfect balance between richness and freshness.
Whether you’re baking for guests, sharing on Pinterest, or just craving something sweet and citrusy, this recipe is quick, reliable, and always satisfying.
Once you try them, they’ll definitely become one of your favorite go-to desserts 🍋✨