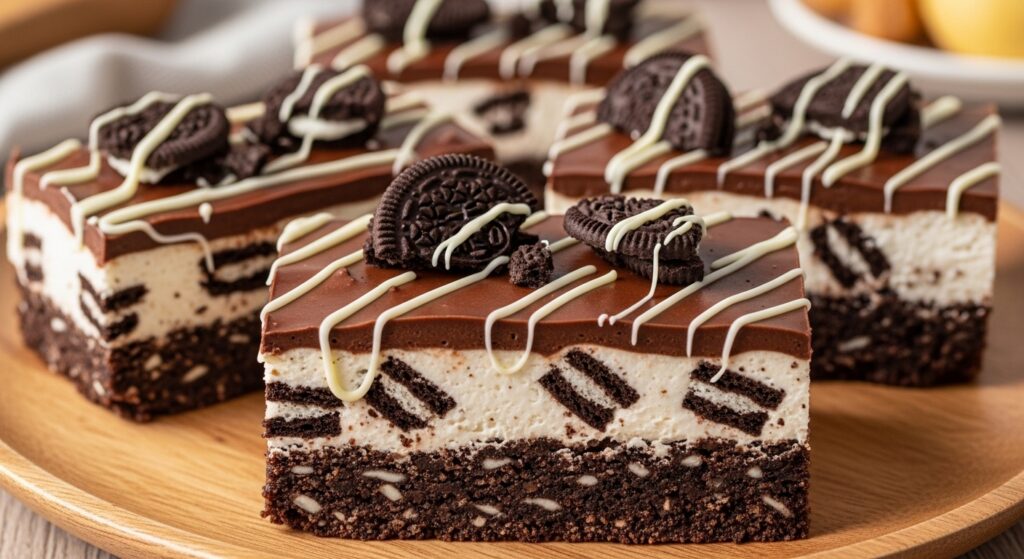
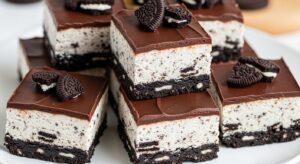
No-Bake Oreo Bars are a conveniently cool dessert that melt-in-your-mouth with a crunchy cookie crust and silky chocolate filling. These bars require no oven work, making them ideal for last-minute gatherings or sweet cravings. The Oreo layer provides a buttery bite, while the homemade chocolate filling balances with chewy texture and slightly tangy finish.
Recipe Overview
| Prep Time | 20 minutes |
| Cook Time | 0 minutes |
| Total Time | 4 hours |
| Servings | 16 bars |
| Difficulty | Easy |
| Cuisine | American |
Why This Recipe Works
No-Bake Oreo Bars simplify dessert preparation while delivering bakery-perfect results. The crumb base sets through chilling, not baking, so fragile textures stay intact. Unlike store-bought versions, this homemade version avoids additives while maintaining gooey centers. I prefer using a thick chocolate ganache layer to contrast the crisp cookie crust without overwhelming flavor.
These bars shine for their make-ahead flexibility and texture contrast. When crisp and creamy collide between bites, the combination feels indulgent yet approachable. For busy weekends, they require rest time but not active work, making them ideal for dinner parties without kitchen stress.
Ingredients
| Ingredient | Quantity | Notes & Substitutions |
|---|---|---|
| Crushed Oreos | 2 1/2 cups | Use double-stuff for extra richness |
| Unsalted butter | 1/2 cup (113g) | Melted vegan butter for dairy-free |
| Semi-sweet chocolate | 1 cup (170g) | 70% cacao for balanced bitterness |
| Heavy cream or coconut milk | 1/4 cup (60ml) | Non-dairy for vegan option |
| Confectioners’ sugar | 1 cup (120g) | Use erythritol for keto |
Step-by-Step Instructions
Prepare the Crust
- Melt butter in microwave-safe bowl (30-second increments)
- Mix with crushed Oreos until crumbs fully moistened
- Press 2/3 of mixture into 8×8-inch parchment-lined pan
Make the Filling
- Chop chocolate into small chips for faster melting
- Combine chocolate with cream in microwave-safe bowl
- Microwave 1 minute, stir, repeat until fully smooth
- Stir in confectioners’ sugar until no lumps remain
Chill and Cut
- Pour filling over Oreo crust, smooth surface
- Top with remaining Oreo crumbs in decorative pattern
- Cover and refrigerate 4+ hours until firm
- Cut into 16 bars using warm, dry knife
Chef Tips for Perfect Results
- Pre-chill mixing bowl to prevent chocolate softening
- Toasted coconut flakes add unique texture when sprinkled on top
- Use kitchen scale for precise Oreo-to-butter ratios
- For gooey center, underlayer with cooked flan or creme caramel
Common Mistakes to Avoid
- Under-moistening crumbs: Crust will crumble – test by pressing mixture between fingers
- Overheating chocolate: Scorching creates bitter taste – stop at 3-minute total heating
- Skipping refrigeration: Cutting too soon leads to messy layers
- Using regular milk: Lacking fat causes chocolate separation
Variations and Substitutions
| Ingredient | Substitution | Impact on Flavor |
|---|---|---|
| Semi-sweet chocolate | White chocolate | Creates sweet, floral alternative |
| Oreos | Vanilla wafers | Lighter, more delicate base |
| Heavy cream | Whole milk | Less rich texture but holds shape |
Serving Suggestions and Pairings
Pure enjoyment as is, but complement with:
- Vanilla ice cream for contrasting temperatures
- Dark chocolate shavings for visual elegance
- Raspberries to balance sweetness
- Whipped crème for retro dessert platters
Perfect for: bridal showers, teacher gifts, or quick summer desserts.
Storage and Reheating
| Method | Duration | Instructions |
|---|---|---|
| Refrigerated | 5 days | Store in airtight container |
| Frozen | 2 months | Wrap individual bars in plastic |
| Room temperature | 2 hours | Keep covered in cool area |
Nutritional Information
| Nutrient | Amount per Serving |
|---|---|
| Calories | 220 kcal |
| Protein | 2 g |
| Fat | 13 g |
| Carbohydrates | 24 g |
| Fiber | 1 g |
| Sugar | 18 g |
| Sodium | 65 mg |
Frequently Asked Questions
Can I make these vegan?
Yes, substitute butter for vegan alternative, cream for coconut milk, and use dark chocolate labeled vegan. The base will remain dense and flavorful with these replacements.
Why did my filling split?
Chocolate separation happens when melting: scorching butter or using low-fat liquids. To fix, re-melt with fresh cream in 30-second intervals while stirring continuously.
How to cut cleanly without crumbling?
Heat knife over stove burner, wipe clean, then cut slowly. Rerun in warm water between slices. Frosting helps if already melted on surface.
Can I prepare ahead?
Make crumb layer up to 24 hours ahead and store in fridge. Complete assembly any time up to 30 minutes before slicing.冷藏的时间越长,层次融合更明显。
What if Oreos don’t crush easily?
Place cookies in sealed zip-top bag and crush with rolling pin. For finer texture, process in food processor 10-15 seconds. Add 1-2 tbsp cocoa powder if desired.
Conclusion
No-Bake Oreo Bars deliver satisfying contrast between crunchy base and smooth chocolate filling with minimal effort. Ideal for satisfying spontaneous dessert wishes or impressing guests. Their make-ahead flexibility and customizable elements ensure these bars become a permanent addition to your go-to recipes. Serve chilled for maximum creaminess and enjoy every melt-in-your-mouth bite.
PrintNo-Bake Oreo Bars with Rich Chocolate Filling
Cool, no-bake Oreo bars with a buttery cookie crust and smooth chocolate filling, perfect for gatherings or satisfying sweet cravings without using the oven.
- Prep Time: 20
- Total Time: 240
- Yield: 16 bars
- Method: Chilling
- Cuisine: American
- Diet: Vegetarian
Ingredients
2 1/2 cups crushed Oreos
1/2 cup (113g) unsalted butter, melted
1 cup (170g) semi-sweet chocolate, chopped
1/4 cup (60ml) heavy cream or coconut milk
1 cup (120g) confectioners’ sugar
Instructions
Melt butter in a microwave-safe bowl for 30-second increments.
Mix melted butter with crushed Oreos until fully moistened.
Press 2/3 of the mixture into an 8×8-inch parchment-lined pan.
Chop chocolate into small chips.
Combine chocolate with cream in a microwave-safe bowl.
Microwave for 1 minute, then stir and repeat until fully smooth.
Stir in confectioners’ sugar until no lumps remain.
Pour the chocolate filling over the Oreo crust and smooth the surface.
Sprinkle remaining Oreo crumbs over the filling in a decorative pattern.
Cover and refrigerate for 4+ hours until firm.
Cut into 16 bars using a warm, dry knife.
Notes
Use double-stuff Oreos for extra richness. Vegan butter and coconut milk make a dairy-free version. For a keto option, use erythritol in place of confectioners’ sugar. Pre-chill the mixing bowl to prevent the chocolate from softening. Store in an airtight container in the refrigerator.