1. Introduction
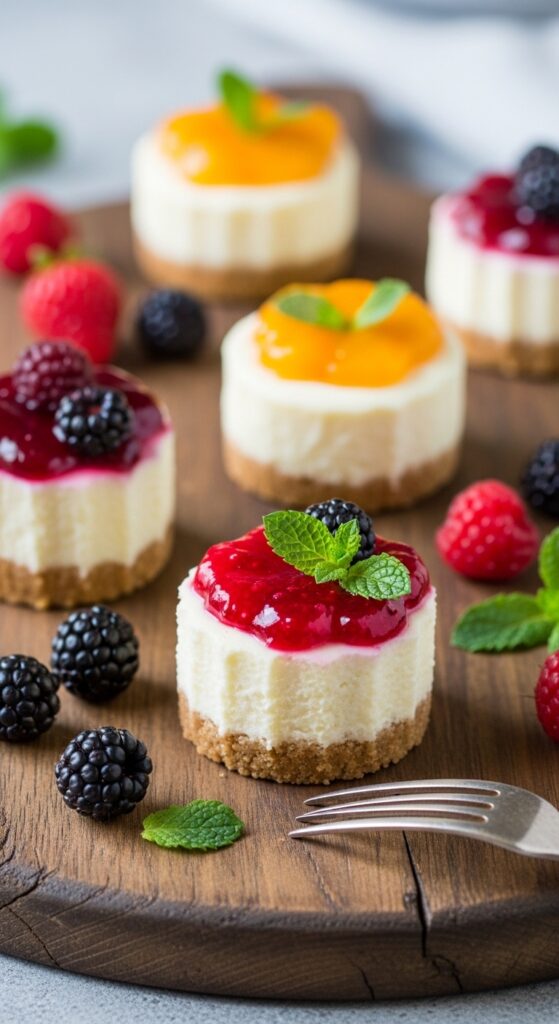
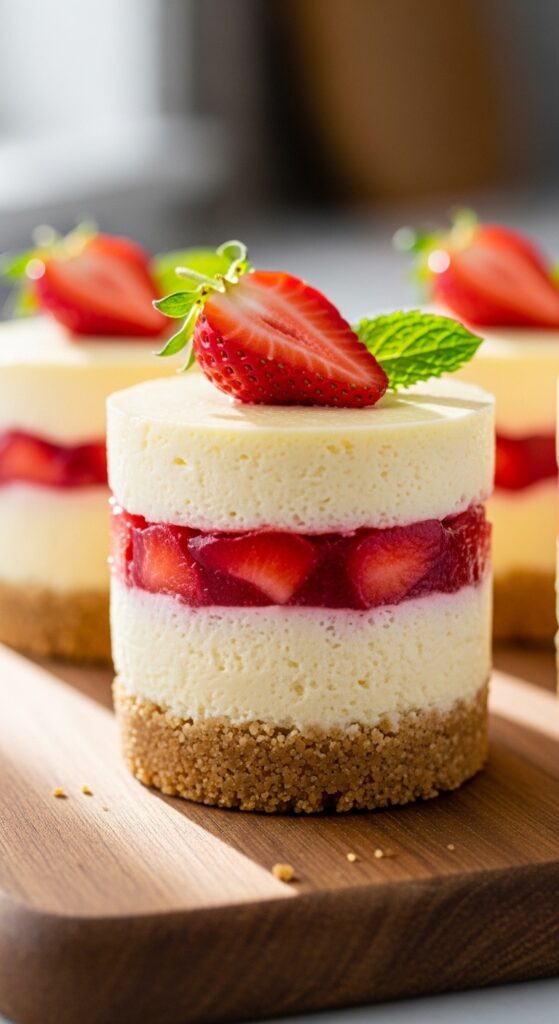
There’s something incredibly satisfying about desserts that are both beautiful and easy to make, and Mini Layered Cheesecakes are exactly that. These delightful, individual-sized treats bring together everything we love about classic cheesecake—creamy texture, rich flavor, and buttery crunch—but in a fun, modern, and highly customizable format.
Unlike traditional cheesecakes that require baking, cooling, and careful slicing, these mini versions are no-bake, quick to assemble, and perfect for beginners. Each layer tells a story: a crumbly base, a silky cheesecake filling, and a flavorful topping that can range from fresh fruits to chocolate or caramel.
Mini Layered Cheesecakes have become a trending dessert, especially on platforms like Pinterest and Instagram, because they are visually stunning and easy to personalize. Whether you’re hosting a party, planning a dessert table, or simply craving something sweet, these cheesecakes are guaranteed to impress.
They’re also incredibly versatile. You can create strawberry, chocolate, Oreo, caramel, or even healthy yogurt-based versions, all using the same base recipe. That’s what makes this dessert a must-have in your recipe collection.
2. Recipe Overview
- Cuisine Type: American / Dessert
- Difficulty Level: Easy ⭐
- Total Time: 20 minutes (plus chilling time)
- Servings: 6–8 mini cheesecakes
Dietary Info:
- Vegetarian
- No-bake dessert
- Can be gluten-free (with GF biscuits)
- Can be low-sugar or dairy-free
3. Equipment and Tools
Essential Tools:
- Mixing bowls (medium & large)
- Hand mixer or whisk
- Measuring cups and spoons
- Spatula
- Serving glasses or jars
Recommended Specifications:
- Glass size: 200 ml per serving
- Bowl size: 2–3 liters
- Layer thickness: 1–2 cm
Optional Tools:
- Piping bag (for clean layers)
- Food processor (for crumbs)
- Offset spatula
4. Serving Suggestions
Mini Layered Cheesecakes are perfect for:
- 🎉 Parties and dessert tables
- 🍓 Summer gatherings
- ☕ Afternoon snacks with coffee
- 🎂 Birthdays and celebrations
Garnish Ideas:
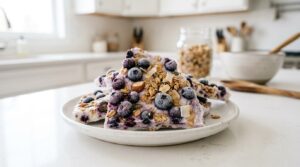
- Fresh fruits (strawberries, blueberries, raspberries)
- Chocolate shavings
- Caramel drizzle
- Crushed cookies
Pair With:
- Coffee or cappuccino ☕
- Iced tea 🍹
- Fresh fruit juice 🍓
5. Nutritional Information (Per Serving)
- Calories: ~280 kcal
- Carbs: 25g
- Protein: 5g
- Fat: 18g
- Sugar: 18g
Notes:
- Can be made lighter with low-fat cream cheese
- Add Greek yogurt for more protein
- Fruit toppings increase vitamins & antioxidants
6. Storage and Reheating

Storage:
- Keep in fridge up to 3 days
- Cover tightly
Freezing:
- Freeze up to 1 month (without fruit topping)
Reheating:
- Not needed – serve chilled
7. Expert Tips and Variations
Pro Tips:
- Use room temperature cream cheese for smooth texture
- Chill at least 2 hours before serving
- Layer neatly for aesthetic look
- Taste filling before assembling
Variations:
- 🍓 Strawberry Cheesecake Layers
- 🍫 Chocolate Cheesecake Layers
- 🍪 Oreo Cheesecake Layers
- 🥭 Mango Cheesecake Layers
- 🥥 Coconut Cheesecake
8. Ingredients Section
For the Crust:
- 1 cup (100g) crushed biscuits or graham crackers
- 3 tbsp (45g) melted butter
For Cheesecake Filling:
- 1 ½ cups (360g) cream cheese
- 1 cup (240ml) heavy cream
- 1/2 cup (100g) sugar
- 1 tsp vanilla extract
For Layers/Toppings:
- 1 cup fresh fruits OR
- Chocolate sauce OR
- Caramel sauce
Ingredient Notes:
- Use high-quality cream cheese
- Fresh fruits give best flavor
- Adjust sugar based on toppings
9. Step-by-Step Instructions
Step 1: Prepare the Crust
- Mix crushed biscuits with melted butter.
- Divide evenly into glasses.
- Press gently to form base layer.
Step 2: Make Cheesecake Filling
- Beat cream cheese until smooth.
- Add sugar and vanilla, mix well.
- Whip cream separately until soft peaks.
- Fold whipped cream into cream cheese mixture.
Step 3: Assemble Layers
- Add cheesecake layer over crust.
- Add fruit or sauce layer.
- Repeat layers until glass is full.
Step 4: Chill
- Refrigerate for 2–3 hours until set.
Step 5: Decorate & Serve
- Top with fruits, chocolate, or cream
- Serve chilled
10. Frequently Asked Questions (FAQ)
1. Can I make these ahead?
Yes, prepare 1 day before serving.
2. Can I use yogurt instead of cream cheese?
Yes, for a lighter version.
3. Can I make it vegan?
Use plant-based cream cheese and coconut cream.
4. Can I use frozen fruits?
Yes, thaw and drain first.
5. How do I make it less sweet?
Reduce sugar or use natural sweeteners.
6. Can I add layers?
Yes! Add as many as you like for visual effect.
11. Why This Dessert Is Special
Mini Layered Cheesecakes stand out because they:
- Are quick and no-bake
- Look beautiful and professional
- Are easy to customize
- Perfect for content creation (Pinterest/blog)
- Great for portion control
12. Presentation Tips
- Use clear glasses to show layers
- Pipe filling for clean look
- Add colorful toppings
- Serve on a tray for events
- Garnish with mint leaves 🌿
13. Conclusion
Mini Layered Cheesecakes are the perfect combination of simplicity, elegance, and flavor. With their creamy texture, crunchy base, and endless topping options, they’re a dessert that fits any occasion. 🍰✨
Whether you’re making them for guests, content, or just yourself, these mini cheesecakes are easy, quick, and always impressive. Once you try them, they’ll become one of your favorite go-to desserts.