1. Introduction
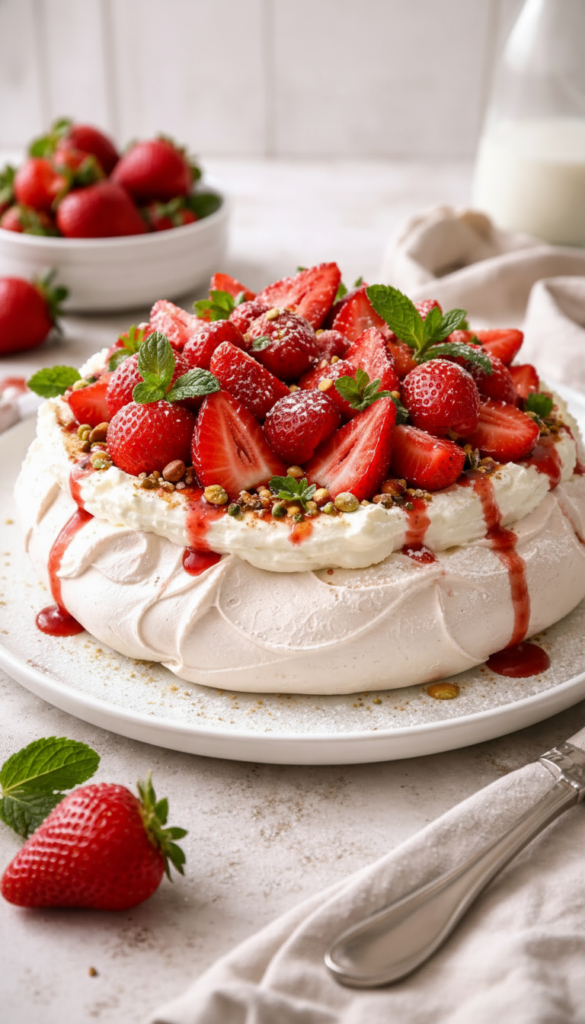
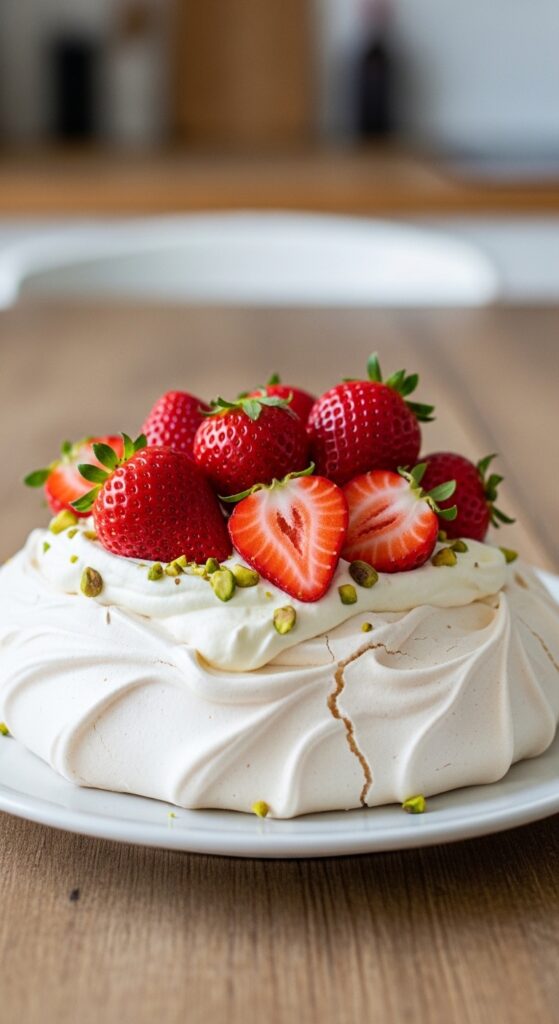
Few desserts capture the spirit of elegance, celebration, and indulgence like a Strawberry Pavlova. With a crisp, delicate meringue shell, a soft, marshmallow-like interior, and layers of luscious whipped cream topped with fresh strawberries, this dessert is a showstopper for any occasion. Whether it’s a birthday, a holiday gathering, or a sunny afternoon treat, a strawberry pavlova embodies both sophistication and simplicity.
Originating in honor of the legendary Russian ballerina Anna Pavlova, this dessert was said to mimic her grace and lightness. While the debate over whether it was created in Australia or New Zealand continues, what’s certain is its global popularity and the way it delights the eyes and taste buds alike.
The magic of a pavlova lies in its contrasts: crunchy yet soft, airy yet rich, sweet yet subtly tangy with fresh fruit. It’s a dessert that feels special but is entirely approachable with the right guidance. By the end of this article, you’ll not only understand how to make a perfect strawberry pavlova but also learn the tips, tricks, and variations that make this dessert unforgettable.
2. Recipe Overview
- Cuisine Type: Australian / New Zealand Inspired
- Difficulty Level: Medium ⭐⭐
- Total Time: 1 hour + 2 hours chilling
- Servings: 6–8
Dietary Information:
- Vegetarian
- Gluten-free (naturally, as meringue contains no flour)
- Dairy-free adaptation possible (with coconut cream)
3. Equipment and Tools
Making a pavlova requires some specific tools to achieve its delicate texture:
Essential Tools:
- Large mixing bowl
- Electric mixer or stand mixer
- Spatula
- Baking sheet lined with parchment paper
- Small saucepan (optional, for stabilizing egg whites)
- Fine sieve for powdered sugar
Serving Tools:
- Cake platter or large serving plate
- Serrated knife for clean slicing (optional)
- Whisk for cream
Measurement Tools:
- Measuring cups and spoons
- Digital kitchen scale (recommended for meringue accuracy)
4. Ingredients
Meringue Base:
- 4 large egg whites (room temperature)
- 1 cup (200g) caster sugar
- 1 tsp white vinegar
- 1 tsp cornstarch (cornflour)
- 1 tsp vanilla extract
Whipped Cream Topping:
- 1 cup (240 ml) heavy whipping cream
- 2 tbsp powdered sugar
- 1 tsp vanilla extract
Fruit Topping:
- 250–300g fresh strawberries
- Optional: 50g blueberries or kiwi slices for extra color
- Optional: mint leaves for garnish
Notes on Ingredients:
- Room temperature egg whites whip better and create more volume.
- Use fresh, ripe strawberries for optimal flavor.
- Cornstarch in the meringue helps stabilize it and prevent cracking.
5. Step-by-Step Instructions
Step 1: Preheat Oven
- Preheat the oven to 120°C (250°F).
- Line a baking sheet with parchment paper and draw a 20 cm (8-inch) circle as a guide for your meringue base.
Step 2: Whip Egg Whites
- Place egg whites in a clean, dry bowl.
- Beat on medium speed until soft peaks form.
- Gradually add caster sugar, 1 tbsp at a time, increasing to high speed until stiff, glossy peaks appear.
- Add vinegar, cornstarch, and vanilla extract; gently fold in with a spatula.
Tip: Test by turning the bowl upside down—if the meringue holds, it’s ready.
Step 3: Shape the Meringue
- Spoon the meringue onto the parchment paper, spreading it to fit the circle.
- Use a spatula to create a shallow well in the center; this will hold the cream and fruit.
Step 4: Bake
- Bake at 120°C (250°F) for 1 hour.
- Turn off the oven and leave the meringue inside for another hour to cool slowly.
Tip: Avoid opening the oven during baking; sudden temperature changes can crack the meringue.
Step 5: Prepare Whipped Cream
- Beat heavy cream with powdered sugar and vanilla extract until soft peaks form.
- Keep chilled until ready to assemble.
Step 6: Prepare Strawberries
- Wash and hull strawberries.
- Slice them or leave some whole for decoration.
- Toss lightly with a teaspoon of sugar if your strawberries are not very sweet.
Step 7: Assemble the Pavlova
- Place the meringue on a serving plate.
- Spoon whipped cream into the well of the meringue.
- Arrange strawberries on top.
- Optional: Add other fruits like kiwi or blueberries for contrast.
- Garnish with mint leaves or a dusting of powdered sugar.
Step 8: Serve
- Best served immediately after assembly.
- Pavlova is delicate; the crisp exterior softens quickly with cream and fruit.
6. Serving Suggestions
- Serve as a centerpiece dessert for holiday tables or summer parties.
- Pair with sparkling wine, champagne, or a light fruit punch for special occasions.
- Cut into wedges and serve on individual plates with extra berries.
7. Storage and Reheating
Storage:
- Unassembled meringue can be stored in an airtight container for up to 3 days.
- Once assembled with cream and fruit, store in the fridge and consume the same day.
Freezing:
- Meringue can be frozen for up to 1 month; thaw at room temperature before use.
- Avoid freezing assembled pavlova as the cream and fruit may become watery.
8. Nutritional Information (Per Serving)
- Calories: ~250 kcal
- Carbs: 35g
- Protein: 4g
- Fat: 12g
- Sugar: 28g
Notes:
- Rich in flavor but light in texture.
- A naturally gluten-free dessert, ideal for parties with dietary restrictions.
9. Expert Tips and Tricks
- Egg Whites: Ensure no yolk remains in the whites; even a small amount of fat prevents stiff peaks.
- Temperature: Room temperature ingredients whip better.
- Vinegar: Helps stabilize meringue and prevent cracking.
- Slow Cooling: Essential for a perfectly crisp exterior.
- Assembly Timing: Only add cream and fruit just before serving to preserve texture.
- Variations:
- Top with passionfruit pulp for a tropical twist.
- Add chocolate shavings for extra decadence.
- Mix berries for a colorful summer pavlova.
10. Common Mistakes to Avoid
- Overbeating Egg Whites: Can cause dry, grainy meringue.
- Underbaking: Results in a meringue that collapses.
- Adding Sugar Too Fast: Can prevent stiff peaks from forming.
- Assembling Too Early: Meringue absorbs moisture from cream and becomes soggy.
11. Frequently Asked Questions (FAQ)
1. Can I make pavlova in advance?
Yes, you can prepare the meringue a day before. Keep it in an airtight container and assemble with cream and fruit just before serving.
2. Why did my meringue crack?
Rapid temperature changes or overbaking can cause cracks. Slow cooling prevents this.
3. Can I use other fruits?
Absolutely! Blueberries, kiwi, mango, or passionfruit all pair wonderfully.
4. Can I make a mini pavlova?
Yes, individual pavlovas are perfect for parties and make serving easier.
5. Can I use frozen strawberries?
It’s possible, but thaw and drain them first to avoid soggy cream.
6. Can I stabilize the cream for longer?
Yes, add 1 tsp cornstarch or use whipped cream stabilizer to prevent it from weeping.
12. Variations and Seasonal Adaptations
- Summer Pavlova: Use berries and stone fruits like peaches and nectarines.
- Tropical Pavlova: Mango, passionfruit, and kiwi.
- Chocolate Pavlova: Drizzle with melted dark chocolate or add cocoa to meringue.
- Mini Pavlovas: Perfect for individual servings at parties or afternoon tea.
13. Tips for Perfect Presentation
- Use a large, flat plate to showcase the meringue’s height and curves.
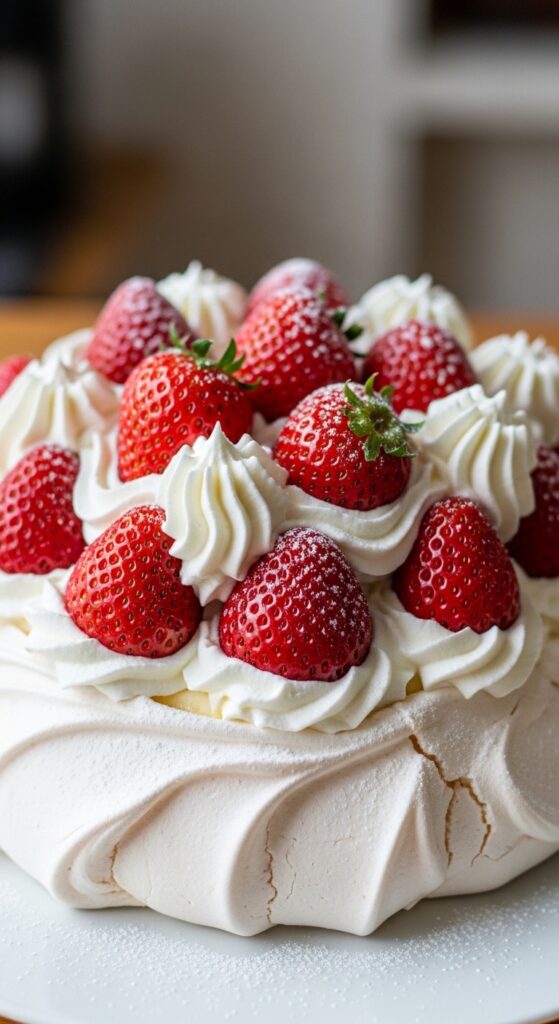
- Garnish with a few whole strawberries on top for visual appeal.
- Lightly dust powdered sugar for a snowy effect.
- Serve with a side of extra whipped cream for indulgence.
14. Conclusion
The Strawberry Pavlova is a dessert that balances elegance, simplicity, and indulgence. Its crisp meringue shell, soft interior, and luscious cream and fruit topping make it a sensory delight.
Perfect for celebrations or a beautiful weekend treat, this dessert impresses with its look and taste. With careful preparation, attention to detail, and fresh ingredients, you can create a pavlova that is both stunning and delicious.
Whether you stick to classic strawberries or experiment with other fruits, this dessert is guaranteed to become a favorite centerpiece at any table. It’s a testament to how simplicity, combined with the right techniques, creates a dessert that feels luxurious and unforgettable 🍓✨