1. Introduction
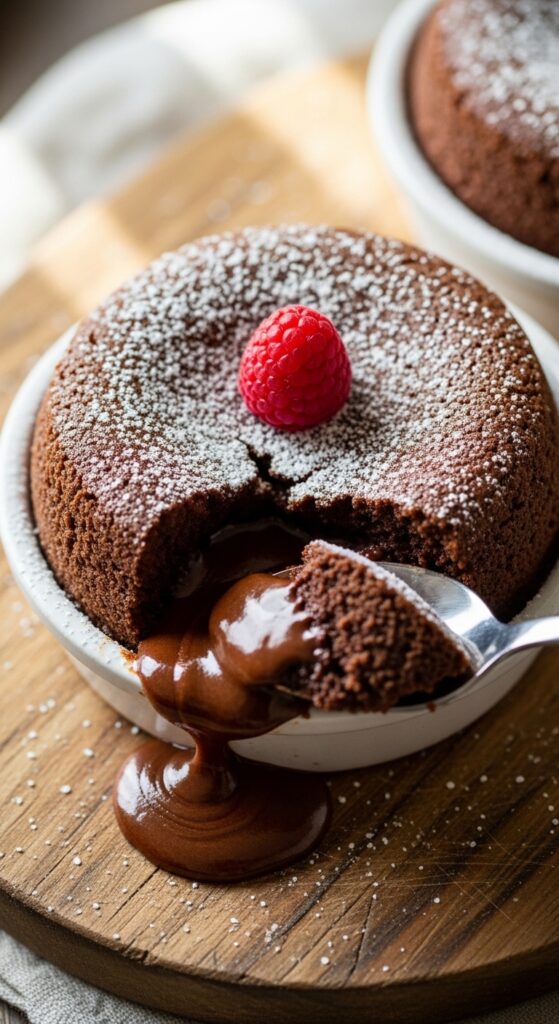
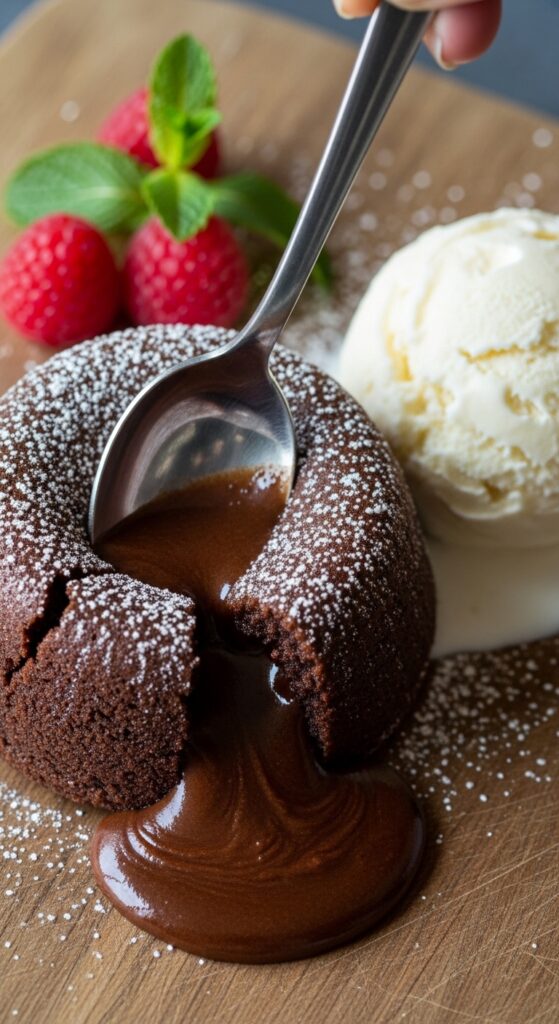
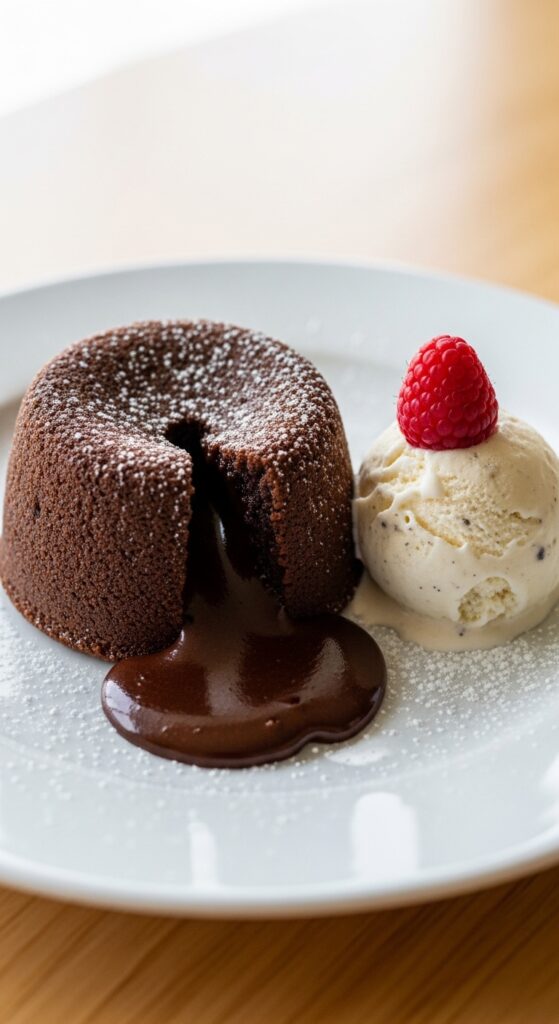
Few desserts create the same “wow” moment as a perfectly baked Chocolate Lava Cake. Crack open its soft outer layer, and a warm, gooey chocolate center flows out like molten gold—rich, indulgent, and absolutely irresistible.
This iconic dessert, often associated with fine dining and elegant restaurants, actually has a surprisingly simple origin. Popularized in the 1980s, chocolate lava cake became famous for its dramatic presentation and luxurious texture. But here’s the secret: you don’t need to be a professional chef to make it at home.
What makes this recipe truly special is how quickly and easily it comes together. In just 20 minutes, you can create a dessert that feels gourmet, tastes decadent, and looks stunning on any table. Whether you’re impressing guests, planning a romantic dessert, or simply treating yourself, chocolate lava cake never disappoints.
2. Recipe Overview
- Cuisine Type: French-inspired
- Difficulty Level: Easy to Medium ⭐⭐
- Total Time: 20 minutes
- Servings: 4 individual cakes
Dietary Info:
- Vegetarian
- Can be adapted to gluten-free
3. Equipment and Tools
Essential Tools:
- Mixing bowls (medium + large)
- Whisk or electric mixer
- Spatula
- Ramekins (4 small molds, ~180 ml each)
- Baking tray
Measurements:
- Measuring cups (240 ml standard)
- Measuring spoons
Optional:
- Butter + cocoa powder (for greasing ramekins)
- Ice cream scoop (for serving)
4. Serving Suggestions
How to Serve:
- Serve immediately while warm
- Invert onto a plate or serve directly in ramekin
Garnish Ideas:
- Powdered sugar 🍫
- Fresh berries 🍓
- Mint leaves 🌿
Perfect Pairings:
- Vanilla ice cream 🍨
- Whipped cream
- Espresso or coffee ☕
5. Nutritional Information (Per Serving)
- Calories: ~380 kcal
- Carbs: 35g
- Protein: 6g
- Fat: 24g
- Sugar: 25g
Notes:
- Rich, high-energy dessert
- Best enjoyed in moderation
6. Storage and Reheating
Storage:
- Store in fridge up to 2 days
Freezing:
- Freeze unbaked batter in ramekins (up to 1 month)
Reheating:
- Microwave for 20–30 seconds
- Or bake again for a few minutes
7. Expert Tips and Variations
Pro Tips:
- Use high-quality dark chocolate 🍫
- Don’t overbake → center must stay molten
- Grease ramekins well to avoid sticking
Common Mistakes:
- ❌ Overbaking → no lava center
- ❌ Too much flour → dense cake
Variations:
- Add peanut butter center 🥜
- Add caramel filling
- Sprinkle sea salt for contrast
8. Ingredients
Main Ingredients:
- 200g (7 oz) dark chocolate
- 120g (1/2 cup) butter
- 100g (1/2 cup) sugar
- 2 whole eggs
- 2 egg yolks
- 50g (1/3 cup) flour
Optional:
- 1 tsp vanilla extract
- Pinch of salt
9. Step-by-Step Instructions
Step 1: Melt Chocolate
- Melt chocolate + butter together
- Stir until smooth
👉 Use microwave or double boiler
Step 2: Mix Eggs
- Whisk eggs + yolks + sugar
- Until slightly thick and pale
Step 3: Combine
- Add melted chocolate to egg mixture
- Mix gently
- Fold in flour
Step 4: Prepare Ramekins
- Grease with butter
- Dust with cocoa powder
Step 5: Bake
- Pour batter into ramekins
- Bake at 200°C (390°F) for 10–12 minutes
👉 Edges firm, center soft
Step 6: Serve
- Let rest 1 minute
- Invert or serve directly
- Enjoy the molten center!
10. Frequently Asked Questions (FAQ)
1. Why didn’t my cake have lava inside?
It was likely overbaked—reduce baking time.
2. Can I prepare batter ahead?
Yes, refrigerate and bake when ready.
3. What chocolate is best?
Use at least 60–70% dark chocolate.
4. Can I make it without eggs?
It’s possible, but texture will change.
5. Can I use muffin tins?
Yes, but adjust baking time slightly.
11. Conclusion
Chocolate Lava Cake is the ultimate combination of simplicity and luxury. With just a few ingredients and minimal time, you can create a dessert that feels straight out of a high-end restaurant.
Its rich chocolate flavor, paired with that iconic molten center, makes it unforgettable for anyone who tries it. Whether served with ice cream, berries, or enjoyed on its own, it’s a guaranteed crowd-pleaser.
Once you master this recipe, you’ll always have a quick, impressive dessert ready whenever the craving hits 🍫✨